when we began this process, we only had a few rules. one of them was real wood high performance windows.
at the conception of this project, we were thinking about making a pretty good house. Super insulated, airtight, with triple glazed windows and a heat recovery ventilator, but not necessarily passivhaus. since we ruled out plastic or fiberglass, US built windows were at the top of the list. once we decided to build to passivhaus, it quickly became clear that we had to look overseas.
our initial pricing was from optiwin, internorn, and pazen. optiwin was very appealing aesthetically but super expensive. internorn provided fantastic pricing, but there was no rep in the US meaning distant communications and pretty much zero support. pazen offers a slightly different product with a fiberglass exterior cladding and more minimal frame profiles, but they only offered a stainless steel clad door. because we had lots of doors, the price jump was huge and they were way out of our budget.
about the same time, our local loewen rep started offering unilux. we visited another local passivhaus project to see them installed, and we were impressed. the pricing was strong, and we felt most comfortable having a rep locally, although they only had a limited understanding of passivhaus. we thought we’d made up our mind, until we stumbled onto zola windows. nearly identical to the german and austrian made passivhaus windows, zola windows are manufactured in poland and offered at a much more competitive price point. we worked through all the options, input the data into PHPP, and scrutinized the sample window section that we got our hands on. it seemed like a good balance between quality, aesthetics, and price point. decision made.
one of the biggest challenges of using european windows is the long lead time (for our order the lead time was estimated at 12-16 weeks). we worked hard to have our window order ready to go by the time we were breaking ground. once we placed the order, the race was on to make sure the house was ready when the windows finally arrived. 18 WEEKS LATER they finally arrived. when we finally opened the container door to check them out, 2 of the biggest units had broken free from their braces and had fallen over at somepoint during shipping. while nothing was catastrophic, there were issues both functional and aesthetic.
fast forward 6 weeks. zola has been super responsive and we’re confident that in the end everything will be as good as new. the windows and doors are installed and are beautiful. the house is dry, the first blower door test went well (.44ach at 50pa), and we are steadily moving toward insulation and sheetrock.
here’s a quick look at some of the process. first, prepping the rough openings:

step 1 – use pink prosoco joint and seam filler at corners and joints of rough opening.
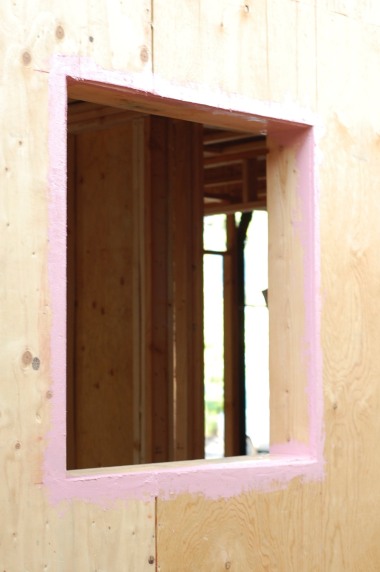

step 2 – use red prosoco fast flash to coat rough opening and extend approx. 6″ out onto sheathing.


to apply these prosoco products, simply lay down a bead from a caulking gun and spread with a cheap plastic spreader. the result is a waterproof, airtight, and vapor permeable flashing without the usual complications of peel and stick flashings. of course no through wall metal flashings on a passivhaus.


next, windows arrive and are unloaded.
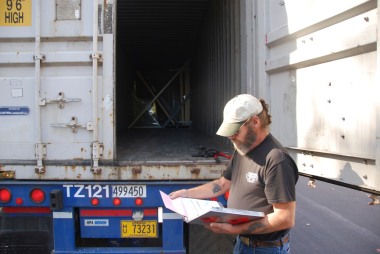
not what you want to see when you open the door of the container. i think they forgot to do the ACTUAL bracing at the factory.

some of these units are HEAVY! thank to Doug Marshak and his Awesome Framing Crew for doing the very heavy lifting.

small tilt/turn unit for the kitchen.

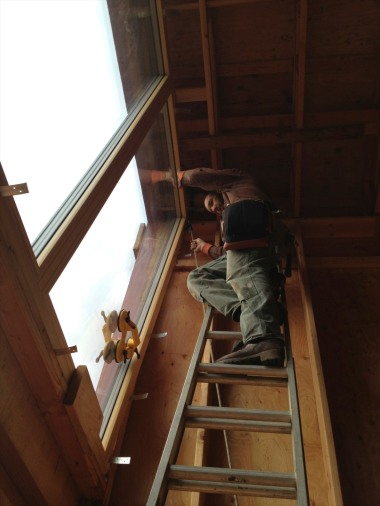
Doug and Jesus installing the small window in the 2 story living room.

the big units waiting to be installed.

after a few nervous hours, the biggest unit finally goes in. thanks to Graeme Thomson for the smart hoisting method.
the large fixed unit installed above the lift/slide door.

front door with translucent glass and large window to the street.

breezeway with tilt/turn terrace door and fixed sidelite.

studio with tilt/turn door and fixed sidelite.


check back soon for more as we try to catch up with construction: HRV rough-in, steel stair installation, flashing the windows, installing the exterior insulation, and rainscreen furring.


